How to Clear Cache in Windows 11: Ultimate Guide
Does your PC, which used to feel lightning-fast, now seem to struggle with simple tasks? It’s a common frustration. As you use your computer day-to-day, hidden data accumulates in the background and can eventually clog up your system. Learning how to clear cache in Windows 11 is one of the most effective and accessible ways to reclaim valuable storage space and get your machine running simply and vividly again.
It doesn’t matter if you are an IT professional managing complicated networks or just a casual user who wants web pages to load instantly—this guide breaks down everything you need to know about safely removing temporary files to optimize performance.
Why Does Cache Buildup Happen?
Cache files are essentially “cheat sheets” that your operating system and applications create to load content faster during future uses. While the intention is to improve speed, these “temporary” files often stick around long past their expiration date.
Some of the most common space-hogs include:
- Windows Update Files: Massive installation files that often remain on your drive even after the update is finished.
- Browser Cache: Various scripts, images, and cookies saved by browsers like Edge, Chrome, or Firefox.
- DNS Cache: A log of websites you have visited previously; if this data becomes outdated, it can lead to connectivity errors.
- App Temporary Files: Residual data left behind by software such as Microsoft Office, Photoshop, or Spotify.
How to Clear Cache in Windows 11: Basic Fixes
If you are looking for an immediate performance boost, start with these user-friendly tools that come pre-installed on Windows 11.
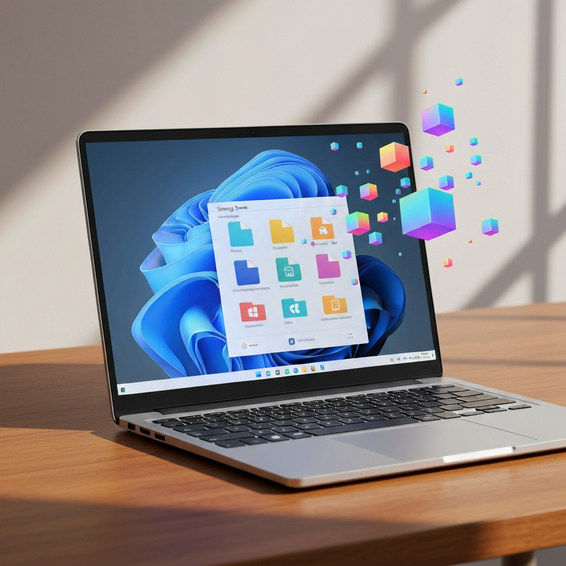
1. Use Storage Sense (The Modern Method)
Windows 11 includes a robust feature known as Storage Sense, designed to automate the cleanup process. It is arguably the safest method for clearing junk because it intuitively knows which files are safe to delete.
- Press the Windows Key + I shortcut to launch Settings.
- Navigate to System and then select Storage.
- Toggle the switch next to Storage Sense to the “On” position.
- To run a manual clean immediately, click on Cleanup recommendations. Windows will scan your drive for large unused files, temporary data, and cloud content that is safe to remove.
2. Disk Cleanup (The Classic Method)
Long-time Windows users will likely remember this utility. While the interface looks older, it digs a little deeper into the file system than the modern Settings menu.
- Click the Start button, type Disk Cleanup in the search bar, and open the app.
- Choose your primary drive (most likely C:) and click OK.
- Tick the checkboxes next to Temporary Internet Files, Thumbnails, and Delivery Optimization Files.
- For a more thorough scrub, click the button labeled Clean up system files (this is required to remove old Windows update data).
Advanced Solutions for Power Users
Sometimes the basic methods aren’t enough to fix specific glitches or connectivity lags. You may need to target specific system caches, particularly if you are troubleshooting network problems for smart home devices.
3. Flush DNS Cache
If you are struggling to load specific websites or access local dashboards—for instance, if you cannot connect to the local server for your SyncBricks Smart Home configuration—corrupted DNS data is likely the culprit.
- Open the Start menu and search for cmd. Right-click on Command Prompt and choose Run as administrator.
- Enter the command below and hit Enter:
ipconfig /flushdns - You should immediately see a confirmation message stating that the DNS resolver cache was successfully flushed.
4. Clear Microsoft Store Cache
Is the Microsoft Store acting up, refusing to download new apps, or stuck on “Pending”? Resetting the Store’s specific cache usually resolves these glitches instantly.
Simply press Windows Key + R to open the Run dialog, type wsreset.exe, and press Enter. A blank command prompt window will pop up for roughly ten seconds, after which the Store will launch automatically.
5. Clear Location Cache
Windows maintains a history of your physical location to help relevant services run better. However, clearing this history can sometimes fix issues with weather widgets or map applications.
Navigate to Settings > Privacy & security > Location. Scroll down to find Location history and simply click the Clear button.
Best Practices for Optimization
Clearing your cache shouldn’t be a one-off event; it works best as part of a regular maintenance routine. Here are a few habits to keep your Windows 11 PC healthy:
- Automate Storage Sense: Configure the settings so Storage Sense runs automatically every week or whenever your disk space runs low.
- Restart Frequently: A simple reboot clears the RAM cache and stops rogue background processes that might be leaking memory.
- Refresh Bluetooth Cache: Occasionally, you may need to unpair and re-pair peripherals to clear the Bluetooth cache. This is especially helpful if you notice audio syncing issues with high-end gear like the Apple AirPods Pro 3.
Frequently Asked Questions
Is it safe to delete all temporary files in Windows 11?
Generally, yes. Windows has built-in safeguards that prevent you from deleting files that are currently being used by active programs. However, be cautious with the “Downloads” folder option in Storage Sense; do not check that box unless you are certain you have moved or backed up the files you want to keep.
Does clearing cache speed up my computer?
Absolutely. Clearing the cache frees up hard drive space and eliminates corrupted data that can cause applications to hang or crash, resulting in a smoother overall experience.
How often should I clear my Windows cache?
For most casual users, a monthly cleanup is perfectly adequate. However, developers, gamers, or power users may find that a bi-weekly schedule keeps their system simpler and faster.
Conclusion
Understanding how to clear cache in Windows 11 is a fundamental skill for keeping your PC in top shape. Whether you rely on the automated ease of Storage Sense or manually flush your DNS via the command prompt, these steps ensure your system stays responsive and glitch-free.
Don’t wait until your computer completely freezes up to take action. implement these automatic schedules today and enjoy a cleaner, faster Windows experience.