How to Build AI Blog Automation with n8n: Complete Technical Guide
Consistently churning out high-quality content is a massive hurdle for developers, marketers, and business owners alike. Crafting solid technical articles eats up hours of your day, and wrestling with the publishing workflow can easily leave you feeling overwhelmed.
Imagine, though, if your website could handle the research, drafting, and publishing of optimized articles all by itself. When you pair the capabilities of Large Language Models (LLMs) with a robust workflow engine, that dream actually becomes a reality.
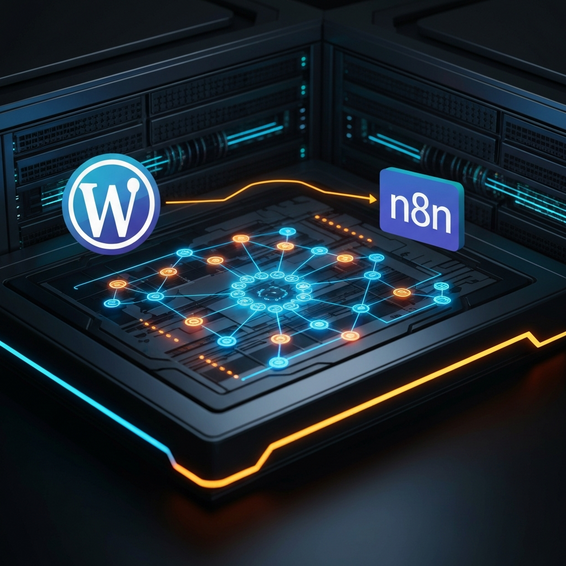
If you’ve been searching for how to build ai blog automation with n8n, you’ve landed in exactly the right spot. Throughout this detailed technical guide, we’ll break down how to hook up OpenAI to WordPress using n8n, helping you forge a completely autonomous content engine.
Why Content Generation Becomes a Bottleneck
For the majority of teams out there, producing content demands a frustrating amount of context switching. You constantly find yourself bouncing from a keyword research tool to a word processor, over to an AI interface like ChatGPT, and finally into your WordPress dashboard.
At its core, creating content is a multi-disciplinary job. It pulls together technical research, engaging copywriting, proper formatting, and CMS management. Whenever solo developers or small IT teams have to carve out hours just to draft up technical docs or blog posts, it inevitably drags their focus away from crucial engineering work.
From a technical standpoint, this bottleneck exists because our systems just aren’t talking to each other. Sure, AI can spit out text incredibly fast, but if you’re still manually copying, formatting, and pasting that text into WordPress, you’re entirely defeating the purpose of using time-saving tech. Plus, doing things by hand almost guarantees inconsistencies. It’s all too easy to forget an image’s alt text, skip a crucial meta description, or neglect to interlink your related articles.
If you actually want to scale up, you need automation workflows capable of handling all that tedious data routing behind the scenes. That’s where a visual, node-based automation tool like n8n steps in to beautifully bridge the gap between raw AI processing and your Content Management System (CMS).
How to Build AI Blog Automation with n8n (The Basics)
Before jumping into complicated data routing and automated image generation, we first need to lay down a solid foundation. This means getting your infrastructure ready and opening a direct line of communication between all your chosen tools.
Try following these foundational steps to get your very first automated workflow off the ground:
- Deploy Your Workflow Engine: You have the choice of using n8n Cloud or spinning up a self-hosted n8n instance via Docker. We highly recommend self-hosting for tech-savvy users, as it completely bypasses those pesky monthly task limits.
- Generate an OpenAI API Key: Head over to the OpenAI developer dashboard, load some funds into your account, and generate a brand-new secret key. You’ll absolutely need this to fuel the OpenAI API integration.
- Create a WordPress Application Password: Log into your WordPress admin panel and navigate to Users > Profile. Scroll down until you see Application Passwords, generate a new one, and make sure to save it safely. This little credential is what allows n8n to securely authenticate through the WordPress REST API.
- Build the Core n8n Workflow: Drop in a Schedule trigger so the whole process kicks off automatically. Link that over to an HTTP Request node (or use the native OpenAI node) to generate your text. Lastly, pipe that fresh output straight into a WordPress node to draft a new post.
With this straightforward pipeline in place, you’ve just built a WordPress AI blog that can effortlessly pump out basic text posts on a reliable schedule.
Advanced Solutions: Creating a Complete Content Machine
Once your foundational pipeline is up and running smoothly, it’s time to put on your developer hat and look at the bigger picture. After all, running a top-tier SEO blog automation takes quite a bit more effort than firing off a single prompt. You’re going to need to chain those prompts together, handle intricate formatting, and generate metadata completely programmatically.
1. Chaining LLM Prompts for Quality Content
Relying on single-shot prompts usually leaves you with generic, robotic-sounding text that nobody really wants to read. To achieve genuinely high-quality results, it’s best to string multiple AI nodes together in a logical sequence.
- Node 1 (The Outline): First, ask the AI to map out a highly structured outline centered around your seed keyword.
- Node 2 (The Draft): Next, feed that outline into a second AI node to write the actual article. Be sure to request specific HTML formatting here, like properly nested H2 and H3 tags.
- Node 3 (The Meta Data): Finally, have a faster, more lightweight model (something like GPT-4o-mini) read over the finished draft to summarize it into a punchy, 150-character SEO meta description.
2. Automating Image Generation and Uploads
No blog post is truly complete without an eye-catching featured image. Luckily, you can drop an HTTP Request node into n8n to call the DALL-E 3 API, feeding it a quick summary of your article to use as the image prompt.
The moment that image is generated, bring in a secondary HTTP Request node to download it directly as a binary file. From there, you’ll leverage the WordPress REST API to POST that file straight into your /wp-json/wp/v2/media endpoint. Just extract the Image ID that WordPress hands back, and assign it as the featured media ID in your final post-creation node.
3. Custom API Payloads for WordPress
When it comes time to finalize the post, skipping the standard n8n WordPress node and using a custom HTTP Request node instead will give you ultimate flexibility. Doing so allows you to cleanly map dynamic tags and categories using standard JSON.
{
  "title": "{{ $json.generated_title }}",
  "content": "{{ $json.html_content }}",
  "status": "draft",
  "categories": [ 44, 49 ],
  "meta": {
    "_yoast_wpseo_metadesc": "{{ $json.meta_description }}"
  }
}
By taking this custom route, you guarantee that your WordPress setups receive perfectly formatted, SEO-ready data without fail.
4. Deploying n8n via Docker for Unrestricted Access
If you happen to be running a HomeLab or managing your own cloud VPS, deploying n8n via Docker is hands-down the most efficient way to go. Not only does it give you total command over your environment variables, but it also strips away any restrictive execution limits.
To save you some time, here is a standard docker-compose.yml file that will help you get everything spinning in just a matter of minutes:
version: '3.8'
services:
  n8n:
    image: docker.n8n.io/n8nio/n8n
    restart: always
    ports:
      - "5678:5678"
    environment:
      - N8N_HOST=n8n.yourdomain.com
      - N8N_PORT=5678
      - N8N_PROTOCOL=https
      - NODE_ENV=production
      - WEBHOOK_URL=https://n8n.yourdomain.com/
    volumes:
      - n8n_data:/home/node/.n8n
volumes:
  n8n_data:
5. Engineering the Perfect AI Prompt for SEO
The overall success of an automated content engine hinges almost entirely on how well you instruct the LLM. If you give it vague instructions, you’re going to get poor results back. You really have to step into the role of a prompt engineer to guarantee the output adheres to strict search engine guidelines.
While you are configuring that OpenAI node inside n8n, try utilizing a system prompt that looks a bit like this:
You are a senior technical SEO writer. Write a comprehensive 1200-word article about [Keyword]. Use short paragraphs of 2-3 sentences. Include numbered lists and bold key terminology. Output the final response strictly in HTML format using H2 and H3 tags. Do not include a title tag (H1), start directly with the introduction.
When you enforce HTML formatting right at the API level, your n8n workflow can smoothly pass perfectly structured text straight into your WordPress database—saving you from having to build out messy string manipulation nodes later.
Best Practices for Automated Content Creation
Operating a fully automated workflow isn’t just a “set it and forget it” deal; it requires strict adherence to both security protocols and performance optimization best practices.
- Human-in-the-Loop Optimization: You should never configure your automated posts to “publish” immediately. Always default the status to “draft.” This vital step gives a human editor the chance to fact-check, sprinkle in personal anecdotes (which is essential for EEAT), and polish the formatting before the piece goes live.
- Security and Authentication: Keep your OpenAI keys and WordPress application passwords locked down tight inside n8n’s Credentials manager. Never, ever hardcode your sensitive keys directly into the nodes or JSON payloads.
- Performance and Rate Limits: Let’s face it: LLM APIs will inevitably time out or hit you with rate limit errors. Make sure to toggle on the “Retry on Fail” settings within your n8n nodes. Throwing a quick 5-second sleep node between heavy API calls is also a fantastic way to prevent server throttling.
- Docker Self-Hosting Advice: If you are running n8n on a Virtual Private Server (VPS), take the time to secure your instance behind a reliable reverse proxy—like Traefik or Nginx Proxy Manager—paired with automated SSL certificates.
Recommended Tools and Resources
To seamlessly replicate this powerful setup, make sure you have the following tools lined up in your developer stack:
- n8n: This is your primary workflow automation powerhouse. You can grab it as an open-source tool or opt for the fully managed version.
- Hetzner or DigitalOcean: Both are incredibly reliable, budget-friendly cloud providers perfect for spinning up a VPS to run your self-hosted Docker containers.
- OpenAI Platform: Absolutely mandatory for accessing top-tier models like GPT-4o and DALL-E through the API.
- WordPress REST API Handbook: Consider this required reading if you want to properly grasp endpoints, secure authentication, and custom meta-field mapping.
Frequently Asked Questions (FAQ)
Is n8n free to use?
n8n operates under a unique “fair-code” license. This means you are completely free to self-host it for your own internal projects. However, if you’d rather not deal with server maintenance, n8n Cloud provides tiered pricing based on your monthly workflow executions.
Will Google penalize AI-generated content?
Google has been quite clear on this: they reward highly helpful, quality content regardless of how it was produced. They actively penalize spam, not the use of AI itself. As long as your workflow is churning out insightful, original, and well-structured information, it absolutely has the potential to rank well in search results. This exact reasoning is why that “human-in-the-loop” drafting phase is so heavily recommended.
Do I need to know how to code to use n8n?
Not necessarily, as n8n is primarily a visual, node-based builder. That being said, having a fundamental grasp of JSON, HTTP requests, and how APIs function will drastically expand what you are capable of building—and make troubleshooting much easier when things go wrong.
Conclusion
Ultimately, putting your content pipeline on autopilot is one of the most high-leverage projects a developer or marketer can tackle. By fusing the intelligence of advanced language models with the sheer power of robust workflow engines, you can finally ditch the manual data entry and win back countless hours of your week.
Figuring out how to build ai blog automation with n8n isn’t merely a time-saving hack; it’s a strategic move to scale your digital presence efficiently. Start off small by just generating simple drafts, and then gradually layer in those advanced features like automated image generation and dynamic SEO metadata mapping.
If you diligently implement the steps and best practices laid out in this guide, you will be well on your way to running a remarkably high-performance, autonomous publishing platform.