10 Best HomeLab Projects for Beginners: Self-Hosting Guide
Building your own personal server environment is practically a rite of passage for developers, IT pros, and general tech enthusiasts alike. After unboxing the hardware, installing your operating system of choice, and successfully booting up the machine, a common question arises: What now? Figuring out the best homelab projects for beginners is the key to maintaining that initial momentum and getting the most out of your learning experience.
It’s incredibly common for newcomers to hit a wall of analysis paralysis as soon as the initial hardware setup is done. With such a vast ocean of open-source software and self-hosting possibilities out there, the choices can easily feel overwhelming. If you don’t have a clear direction, you run the risk of letting a perfectly good machine sit in the corner, gathering dust and remaining entirely underutilized.
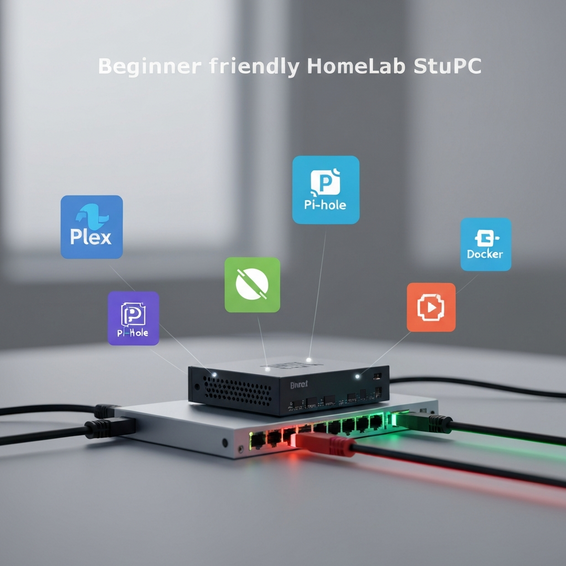
So, what are the best homelab projects for beginners? To get off to a strong start, top self-hosted applications generally include Pi-hole to block ads across your entire network, Nextcloud for secure private file storage, and Jellyfin for media streaming. You’ll also want to look into Uptime Kuma for monitoring your services and Portainer to make managing Docker containers a breeze.
In this guide, we’ll walk you through some of the most educational and highly rewarding self-hosted projects available today. By tackling these foundational setups, you’ll naturally develop valuable DevOps skills, significantly improve your home network’s security, and ultimately take back complete control over your own personal data.
Why This Problem Happens: Overwhelmed Before Finding the Best Homelab Projects for Beginners
Deploying a bare-metal hypervisor like Proxmox VE—or even just installing a fresh Linux distribution—leaves you staring at a completely blank slate. Interestingly, this absolute freedom is exactly what causes the dreaded “empty server dilemma.” Rather than mastering the basics first, eager beginners frequently try to jump straight into deploying complex, enterprise-grade architectures.
Attempting to build a high-availability Kubernetes cluster or configure advanced BGP networking on day one, for example, is a fast track to intense frustration and burnout. Because the learning curve for these advanced orchestration tools is so incredibly steep, it’s vital to develop a solid grasp of basic networking, containerization, and storage management beforehand.
Ultimately, the technical friction beginners face boils down to a lack of a structured learning path. When you focus strictly on the best homelab projects for beginners, you essentially build a stepping-stone approach to your own IT education. You can start small with single-container deployments, gradually learn how networks route traffic, and eventually work your way up to designing highly complex automation workflows.
Quick Fixes / Basic Solutions
Overcoming beginner’s block is easiest when you deploy services that offer immediate, tangible benefits to your daily life. Fortunately, these starter projects are highly documented, quite forgiving, and incredibly satisfying to complete. Here are the top foundational projects to help get your home lab setup successfully off the ground.
- Pi-hole (Network-Wide Ad Blocking): Widely considered the undisputed king of beginner projects, Pi-hole acts as a DNS sinkhole that blocks ads and tracking domains for every single device on your network. Since it operates entirely at the network level, you won’t need to bother installing client-side ad blockers on your mobile phones, tablets, or smart TVs.
- Docker and Portainer: Before you can realistically run dozens of web applications, you need a streamlined method for managing them. Docker neatly containerizes your applications so they run smoothly without frustrating dependency conflicts. Paired with Portainer, you gain a beautiful, user-friendly web GUI that allows you to effortlessly manage all your Docker containers, images, and network stacks.
- Jellyfin or Plex (Media Server): Why not turn your new homelab into a personal, subscription-free version of Netflix? By mapping a network-attached storage (NAS) drive to software like Jellyfin, you can easily organize your movies, music, and TV shows. From there, it dynamically streams your content straight to your smartphone, tablet, or smart TV.
- Nextcloud (Personal Cloud Storage): If you want to escape Big Tech’s data silos, hosting your own Google Drive alternative is a fantastic move. Nextcloud empowers you to securely sync files across all your devices, manage your calendars, and share links with friends. You can even set it to automatically upload photos directly from your smartphone to your private server.
- Uptime Kuma: Once you actually have a few self-hosted services up and running, you’ll need a way to know if they happen to go down. Uptime Kuma is a gorgeous, fast, and entirely self-hosted monitoring tool that continuously pings your services. If something drops offline, it can automatically send convenient push notifications to your phone, Discord, or Telegram.
Advanced Solutions: Next-Level Deployments
After you’ve gotten fully comfortable spinning up basic self-hosted tools, it’s time to step up your game. These more advanced configurations introduce essential enterprise-level concepts, such as secure remote access, efficient traffic routing, and infrastructure as code.
- Reverse Proxy (Nginx Proxy Manager or Traefik): Exposing your internal services to the broader internet using raw IP addresses and open ports is both clunky and highly insecure. Instead, a reverse proxy allows you to safely route incoming traffic using clean, memorable domain names (such as
nextcloud.yourdomain.com). Better yet, it automatically provisions free SSL certificates via Let’s Encrypt to ensure your traffic stays fully secure. - WireGuard or Tailscale VPN: Rather than dangerously opening multiple ports on your home router’s firewall, consider running a personal VPN. WireGuard is fantastic for creating a highly secure, encrypted tunnel directly into your home network. Tailscale takes it a step further, making the process virtually effortless by creating a zero-configuration mesh network that grants you secure remote access whether you’re at a local coffee shop or a hotel halfway around the world.
- Grafana and Prometheus (Monitoring Dashboards): Ready to go far beyond basic uptime tracking? Prometheus works by aggressively scraping hardware metrics—like RAM usage, CPU temperatures, and disk I/O—directly from your servers. Grafana then steps in to query Prometheus, displaying all of this raw data in stunning, highly customizable visual dashboards.
- Automated Backups with Proxmox Backup Server: Ask any IT professional, and they’ll tell you that data loss is a harsh and unforgiving teacher. By setting up a dedicated backup server, you ensure that your virtual machines, container data, and configuration files are automatically snapshotted on a regular schedule. For ultimate peace of mind, you can then securely store this data off-site or on a secondary NAS device.
Best Practices for Your Homelab
Deciding to run a server 24/7 in your own home certainly comes with some serious responsibilities. However, implementing optimization and security best practices early on will save you massive headaches—and prevent potential data loss—down the road.
- Isolate Exposed Services: If you absolutely must expose web applications to the public internet, be sure to place them in a Demilitarized Zone (DMZ) or a completely separate VLAN. This level of containment ensures that if a public-facing service is ever compromised, malicious actors won’t be able to pivot over to your private home network computers.
- Use SSH Keys, Not Passwords: Make it a priority to disable standard password authentication on your Linux servers immediately. Instead, generate cryptographic SSH keys to handle your secure logins. Doing so entirely mitigates the risk of automated brute-force attacks against any of your exposed machines.
- Document Everything You Build: Trust us, your future self will deeply thank you for this habit. Try deploying a lightweight documentation wiki like BookStack, Wiki.js, or even a local Obsidian vault. From there, meticulously record your static IP addresses, configuration file paths, specific terminal commands, and any troubleshooting steps you take along the way.
- Implement the 3-2-1 Backup Strategy: Always strive to keep three complete copies of your crucial data, distributed across two different media types, with at least one copy securely stored off-site. Your homelab shouldn’t be considered a true production-ready environment until your backups are fully automated and routinely tested.
Recommended Tools / Resources
Choosing the right hardware and software stack goes a long way in making these project deployments significantly easier. Let’s clear one thing up: you absolutely do not need massive, power-hungry enterprise rack servers just to get started. Today’s modern micro-architecture is incredibly powerful, nearly silent, and highly energy-efficient.
- Hardware: A great starting point is a Mini PC powered by an Intel N100 processor. These tiny but mighty machines usually consume less than 15 watts of power under load, yet they can easily juggle dozens of Docker containers simultaneously. Alternatively, repurposing an old laptop makes for a fantastic starter server since it inherently comes with an integrated screen and a built-in battery backup (functioning as a UPS).
- Operating Systems: As far as virtualization goes, we highly recommend Proxmox VE as your primary bare-metal hypervisor. It’s enterprise-grade, widely supported, and completely free to use. On the other hand, if you prefer a lighter, strictly containerized approach, a standard Debian or Ubuntu Server installation will prove incredibly stable.
- Networking: It pays off to invest in a reliable managed Gigabit network switch. Having a managed switch is an essential building block because it grants you the ability to experiment with VLANs (Virtual Local Area Networks) and properly segment your homelab traffic on a physical level.
FAQ Section
What is a homelab?
Simply put, a homelab is a dedicated personal computing environment designed for safely testing software, learning advanced networking skills, and hosting your own web applications. Think of it as a secure sandbox where IT professionals, students, and curious hobbyists can experiment freely without the fear of breaking critical production systems.
How much RAM do I need for a beginner homelab?
You can comfortably kick off your self-hosting journey with somewhere between 8GB and 16GB of RAM. If you primarily plan on running lightweight Docker containers—like Pi-hole, Uptime Kuma, or Nextcloud—8GB is generally plenty. However, if you eventually want to virtualize multiple full operating systems using Proxmox VE, it’s wise to aim for 16GB to 32GB to give your virtual machines enough breathing room.
Is it safe to expose my homelab to the internet?
It certainly can be safe, but only if executed correctly. As a rule of thumb, never use default admin passwords, and aggressively avoid opening any unnecessary router ports. For beginners, the absolute safest method is to use a mesh VPN like Tailscale or utilize Cloudflare Tunnels. Both tools offer highly secure external access without the need to open a single inbound firewall port.
Can I run a homelab on a Raspberry Pi?
Absolutely. Thanks to its incredibly low power draw and massive, deeply supportive ecosystem, the Raspberry Pi remains one of the most popular starting points in the homelab community. It is a brilliant choice for lightweight, always-on tasks like DNS filtering, basic static web hosting, or running smart home automation via Home Assistant.
Conclusion
At the end of the day, building your own self-hosted infrastructure is arguably one of the most effective, hands-on ways to learn modern IT concepts. The best homelab projects for beginners are inherently the ones that solve actual, everyday problems in your digital life. By finding and implementing these practical solutions, you’ll naturally stay motivated to learn more and continue pushing your technical boundaries.
Start small so you can secure a few quick wins. Try deploying network-wide ad blocking via Pi-hole this weekend. From there, you might move on to organizing your digital media library with Jellyfin, before finally securing your remote access with a zero-config VPN like Tailscale. As you deploy these self-hosted services one by one, you’ll naturally pick up highly marketable skills spanning Linux administration, Docker container networking, and core cybersecurity principles.
Don’t let the anxiety of empty server analysis paralysis hold you back for another second. Pick just one single project from this comprehensive list today, dive into the official documentation, and start building. Your educational journey into infrastructure is only just beginning, and the possibilities of self-hosting are truly limitless.