How to Automate WordPress Using n8n: Complete Technical Guide
Do you find yourself wasting hours manually publishing posts, updating user profiles, or sorting through form submissions? If you are exhausted by these repetitive chores, learning how to automate WordPress using n8n can completely revolutionize your daily workflow. As your website grows, relying on manual management quickly becomes a huge drain on both developer time and administrative resources.
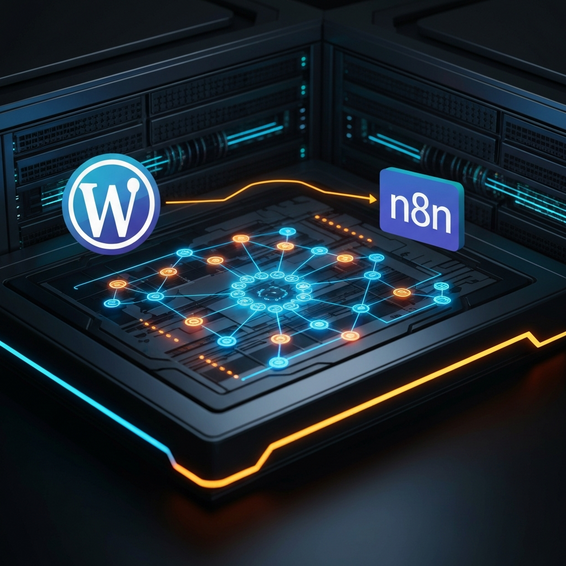
Think of n8n as a highly capable, self-hosted alternative to Zapier. It hooks directly into your WordPress database, tackling complex, repetitive tasks so you don’t have to lift a finger. Whether you are looking to syndicate content or sync important CRM data, setting up custom workflow automations has never been easier for DevOps teams and site administrators alike.
In this comprehensive guide, we will walk you through exactly how to automate WordPress using n8n. We will cover the best practices, dive into technical setups, and explore advanced system integrations that will help you scale your IT operations with ease. Let’s dive right in.
How to Automate WordPress Using n8n: The Quick Answer
Ready to win back your time right now? Follow these core steps to set up your first connection between your website and your automation server. Here is exactly how to automate WordPress using n8n in six straightforward steps:
- Ensure the standard WordPress REST API is active on your site (luckily, this is enabled by default on all modern versions of WordPress).
- Head over to your WordPress user profile and generate a secure Application Password.
- Spin up an n8n instance using a self-hosted Docker container, either in your HomeLab or a preferred cloud environment.
- Open up your n8n workflow canvas and drop in the native WordPress node.
- Plug in your WordPress credentials, including your Site URL, Admin Username, and that newly created Application Password.
- Pick an action—like Create a Post or Update a User—and hit execute to give your new node a test run.
This simple workflow setup serves as the technical foundation for any bidirectional syncing you plan to do between your website and third-party tools.
Why Manual WordPress Management Is a Technical Problem
Keeping a growing WordPress site running smoothly means juggling a lot of moving parts. As your web traffic, eCommerce sales, and user base expand, handling operations manually quickly turns into a major technical bottleneck. Let’s face it: systems tend to break down the moment human error creeps into the data entry process.
Furthermore, data silos naturally pop up when your front-end forms, customer databases, and ERP systems aren’t communicating natively. If you are still manually exporting CSV files or depending on outdated WP-Cron jobs to sync your data, you are likely dealing with delayed response times, bloated server loads, and ultimately, lost revenue.
To make matters worse, many website owners try to fix this by installing a dizzying number of single-purpose integration plugins—one for Mailchimp, another for Slack, and so on. This approach introduces massive plugin bloat, which ramps up database queries and drags down your page load speeds. By offloading these backend processes to an external automation platform like n8n, you can dramatically cut down on server overhead.
Beyond just performance issues, relying on people to handle repetitive database updates brings its own set of security risks. Every time you hand out administrative access just so a team member can publish syndicated content or export user lists, you inadvertently widen your site’s attack surface. Conversely, a centralized automation pipeline operates on strictly scoped permissions, guaranteeing that routine tasks are executed safely and predictably every single time.
Quick Fixes and Basic Automation Solutions
If you are just dipping your toes into the world of self-hosted automation, here are a few basic workflows you can piece together in no time. These actionable setups offer an immediate productivity boost for both content managers and IT administrators.
1. Automated Content Syndication
Setting up a content syndication pipeline is hands-down one of the easiest ways to put this tech stack to work. You can effortlessly link an external RSS feed, a Google Sheet, or an API endpoint directly to your website.
- Trigger: Kick things off by adding a Schedule trigger or Webhook node in your n8n canvas.
- Fetch: Pull in your raw content using a standard HTTP Request node.
- Action: Feed the parsed JSON data straight into the WordPress node to dynamically create a draft or instantly publish a live post, complete with the correct categories.
2. Instant Form Submission Syncing
Rather than constantly logging into your WordPress admin dashboard to check for new contact entries, why not route them directly to your team’s favorite communication channels?
- Trigger: Configure an n8n webhook node to actively listen for any incoming POST requests.
- Configure: Adjust your preferred form plugin so that it sends JSON payloads directly to that specific webhook URL.
- Action: Drop in a Slack, Discord, or Microsoft Teams node to ping your sales team the second a lead comes in.
Advanced Solutions for Developers
Once you have gotten the hang of the fundamentals, it is time to start building advanced, DevOps-level solutions. These more robust methods rely heavily on custom API integrations and a highly resilient system architecture.
Bypassing the Default Node with the WordPress REST API
While the native WordPress node is fantastic for everyday tasks, it does have its limitations. When dealing with complex data structures, developers are better off using the n8n HTTP Request node to interface directly with the WordPress REST API. Taking this route gives you the power to update Custom Post Types (CPTs), tweak Advanced Custom Fields (ACF), and programmatically manage your WooCommerce inventory.
Handling Bi-directional Syncs
Enterprise-level users frequently need bi-directional syncing between their internal ERP systems and their web servers. Imagine an inventory count changing in your warehouse software: this action immediately triggers an n8n webhook. The workflow then queries the exact product ID, securely authenticates the request, and updates the WooCommerce stock level—all without leaning on bulky, slow caching plugins.
Error Handling and Automated Retries
In a serious production environment, your integrations absolutely must be resilient. It is best practice to always configure Error Trigger nodes right inside your canvas. If your WordPress site happens to go offline for brief maintenance, outbound HTTP requests are going to fail. By setting up exponential backoffs and automated Slack alerts, you can guarantee zero data loss even during unexpected server outages.
Best Practices for Workflow Security and Performance
To ensure your automated infrastructure continues running like a well-oiled machine, make sure to strictly follow these critical security and performance guidelines.
- Use Scoped Application Passwords: You should never use your primary administrator password for REST API calls. Always generate a dedicated, single-use application password instead. This way, if your n8n instance is ever compromised, you can instantly revoke the key without risking your main account.
- Enforce IP Whitelisting: Lock down your REST API endpoints. Take the time to configure your Nginx or Apache firewall rules so they only accept API requests that originate from your specific n8n server’s IP address.
- Opt for Webhooks over Polling: Constant API polling puts unnecessary strain on your CPU. Rather than asking the server for updates every five minutes, utilize an n8n webhook to push data out only when a specific event actually happens.
- Self-Host for Privacy: Choosing to deploy n8n inside a Docker container on your own VPS guarantees complete data sovereignty. This makes it the ultimate Zapier alternative, especially for businesses operating in compliance-heavy industries.
Recommended Tools and Resources
Building the ultimate automated tech stack requires reliable infrastructure and a few complementary software plugins. Here are some of our top technical recommendations to get you started:
- Docker Desktop / Portainer: These are absolute essentials for deploying and managing your self-hosted automation containers, whether you are working locally or up in the cloud.
- WP Webhooks Plugin: A wonderfully lightweight tool that lets you easily trigger an n8n webhook whenever highly specific WordPress events occur—like a user logging in or a new product flying off the virtual shelves.
- Advanced Custom Fields (ACF): This plugin is crucial for structuring your backend data, ensuring your automation pipelines can read and write customized meta values without a hitch.
- Cloudflare / Reverse Proxies: We highly recommend using Cloudflare Tunnels or Traefik to secure your n8n interface with SSL. It is the best way to stay protected without exposing your HomeLab directly to the public internet.
Frequently Asked Questions
Will automation slow down my WordPress site?
Not at all—in fact, it usually improves performance. By offloading complex logic, data formatting, and third-party API chatter from your primary web server over to an external n8n container, you actually reduce database locking and significantly lower your server’s RAM usage.
Is n8n a completely free Zapier alternative?
The community edition of n8n operates under a fair-code license, meaning it is completely free to self-host and offers unrestricted workflow executions. However, if you would rather skip the server management entirely, they do offer a very convenient, fully managed cloud version.
Can I trigger an n8n workflow from a custom PHP snippet?
Absolutely. Any PHP function utilizing wp_remote_post() can fire a JSON payload straight to your configured n8n webhook URL. This makes building custom integrations a breeze for plugin developers.
How do I handle image uploads via automation?
Dealing with media requires a slightly different approach. Instead of passing massive base64 encoded strings—which can quickly exhaust your memory limits—you will want to configure your workflow to download the image file to n8n’s temporary storage first. From there, just use the WordPress node’s binary upload feature to securely push the image right into your media library.
Conclusion
Ultimately, mastering modern integration techniques is the most effective way to scale a digital business without letting your administrative costs spiral out of control. By learning how to automate WordPress using n8n, you are able to instantly bridge the gap between your public-facing website and your complex internal IT infrastructure.
Whether your goal is to instantly sync CRM users, automatically syndicate daily blog content, or update eCommerce stock levels on the fly, this robust self-hosted solution offers unparalleled flexibility. Don’t feel overwhelmed—just start small by replacing a single manual task today. Before you know it, you will have constructed a highly resilient, fully automated digital machine that works tirelessly around the clock.